Quick Start
An Arkive consists of data sources which you define and handler
functions that process & transfrom the data. All your data
sources are defined and mapped to their respective handler functions in
the manifest.ts file and all your handler functions are written in
plain TypeScript files.
One trivial application of Arkiver is to index all events emitted for a paricular contract. In this example we will look at how to index all events emitted by a contract using Arkiver
Install the Following
- Deno
- Arkiver CLI
- Docker Compose (if you desire to run the index job locally. Recommended for superior dev experience)
Create an Arkive Job
Let's start by creating an arkiver job with the Arkiver CLI. Run arkiver init and specify the erc20-events template.
$ arkiver init


  ▄████████    ▄████████    ▄█   ▄█▄  ▄█   ▄█    █▄     ▄████████    ▄████████
  ███    ███   ███    ███   ███ ▄███▀ ███  ███    ███   ███    ███   ███    ███
  ███    ███   ███    ███   ███▐██▀   ███▌ ███    ███   ███    █▀    ███    ███
  ███    ███  ▄███▄▄▄▄██▀  ▄█████▀    ███▌ ███    ███  ▄███▄▄▄      ▄███▄▄▄▄██▀
▀███████████ ▀▀███▀▀▀▀▀   ▀▀█████▄    ███▌ ███    ███ ▀▀███▀▀▀     ▀▀███▀▀▀▀▀
  ███    ███ ▀███████████   ███▐██▄   ███  ███    ███   ███    █▄  ▀███████████
  ███    ███   ███    ███   ███ ▀███▄ ███  ███    ███   ███    ███   ███    ███
  ███    █▀    ███    ███   ███   ▀█▀ █▀    ▀██████▀    ██████████   ███    ███
               ███    ███   ▀                                        ███    ███


          -----===== Arkiver v0.4.4 - https://arkiver.net =====-----

 ? Where should we create your arkive? (./cool-new-arkive) › ./erc20_events
 ? Which template would you like to use? (event-wildcard) › erc20-events
 ? Are you using VSCode? (Yes) › Yes
 ✔ Initialized arkive
This arkive exmaple is prepared with everything we need. Let's take a look inside
Infomation overload? Skip to Running the arkive
Entities
Entities specify how the indexed data is stored in the db and how it is accessed via the graphql interface.
We're going to need an entity for each event on the contract. The ERC20 Specification tells us the ERC20 tokens must emit 2 events. Alternatively you can refer to the contract ABI to see what events are emitted.
event Transfer(address indexed from, address indexed to, uint256 value)
event Approval(address indexed owner, address indexed spender, uint256 value)
In entites.ts we create an entity for each event, adding block and hash because they are often useful.
import { createEntity } from "https://deno.land/x/robo_arkiver/mod.ts";

// @note: "Index: true" enhances graphql queries
export const Transfer = createEntity("Transfer", {
  id: String,
  block: { type: Number, index: true },
  hash: String,
  from: String,
  to: String,
  value: String,
});

export const Approval = createEntity("Approval", {
  id: String,
  block: { type: Number, index: true },
  hash: String,
  owner: String,
  spender: String,
  value: String,
});
Manifest
The manifest configures the datasources of the index job.
import { Manifest } from "https://deno.land/x/robo_arkiver/mod.ts";
import erc20 from "./erc20.ts";
import { Transfer, Approval } from "./entities.ts";
import { onTransfer, onApproval } from "./handlers.ts";

const manifest = new Manifest("weth-events");

manifest
  .addEntities([Transfer, Approval])
  .chain("mainnet", { blockRange: 500n })
  .contract(erc20)
  .addSources({ "0xC02aaA39b223FE8D0A0e5C4F27eAD9083C756Cc2": 4729568n })
  .addEventHandlers({ Transfer: onTransfer })
  .addEventHandlers({ Approval: onApproval });

export default manifest.build();
This manifest file configures the arkive job with the following properties:
- Creates a datasource for Ethereum that indexes the WETH contract address, and subscribes to Transfer and Approval events.
- Adds the entities Transfer and Approval, making them accessibly from the graphql endpoint
Handler
handler.ts contains onTransfer and onApproval, which are called for every Transfer and Approval event repectively.
Below is a snippet of handler.ts, specifically the onTransfer function. The function simply extracts the arguments from the event and stores the Transfer document to the db.
export const onTransfer: EventHandlerFor<typeof erc20, "Transfer"> = async ({
  event,
}) => {
  const { from, to, value } = event.args;
  const block = Number(event.blockNumber);
  const id = `${event.transactionHash}:${block}:${event.transactionLogIndex}}`;
  const record = new Transfer({
    id,
    hash: event.transactionHash,
    block,
    from,
    to,
    value: formatUnits(value, TOKEN_DECIMALS),
  });
  record.save();
};
Run Indexing Locally
This step requires docker-compose and the docker engine running.
Run the index job locally:
$ arkiver start .
Desired output:
          -----===== Arkiver v0.4.4 - https://arkiver.net =====-----

[0:simple@v1.0] INFO Running Arkive - simple
🚀 Arkiver playground ready at http://0.0.0.0:4000/graphql
[0:simple@v1.0] INFO Running handlers for blocks 4753115-4753616 (500 blocks - 9 items)
[0:simple@v1.0] INFO Processed blocks 4753115-4753616 in 78.758ms (6348.541 blocks/s - 114.274 items/s)
[0:simple@v1.0] INFO Running handlers for blocks 4753616-4754117 (500 blocks - 18 items)
...
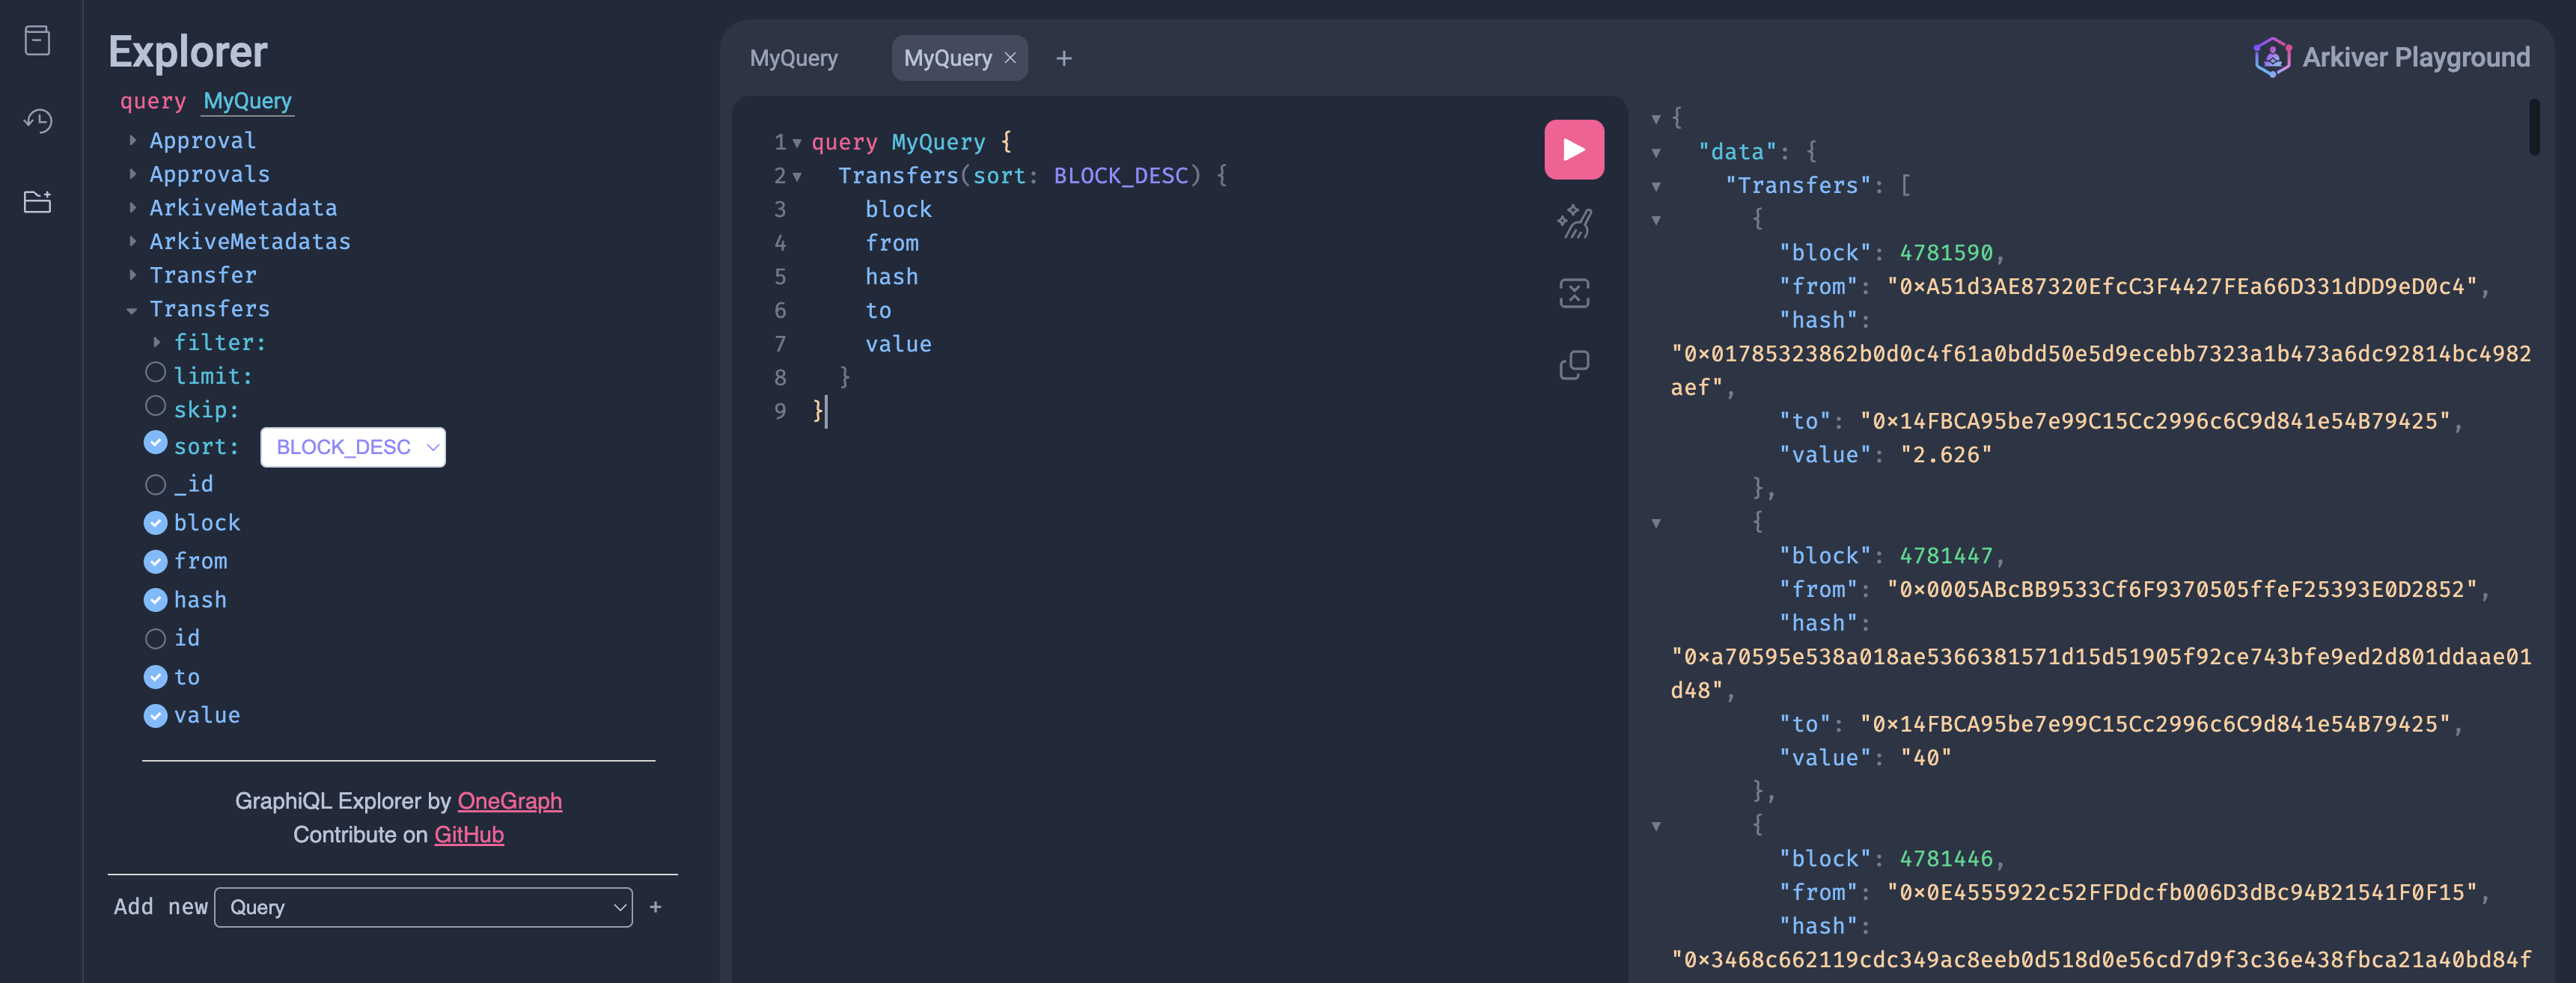
The index job is running, you can now navigate to http://0.0.0.0:4000/graphql to see the graphql explorer to experiment with the indexed data.
Note: Make sure you click the explorer icon on the left menu to see what queery options are available.
Deploy to Production
1. Create Account
Launch the Arkiver app and setup an account: https://app.arkiver.net
2. Login
Login using email and password. (This will be replaced with an api token in the future)
arkiver login
3. Deploy
To deploy the arkive job to production you must sign in to your arkiver account. Run arkiver help for more infomation.
To deploy, simply run:
arkiver deploy .
This will package an deploy the arkive job. The name of the arkive job is specified in the manifiest file, in this example it's "weth-events".
Navigate to https://data.arkiver.net/$USERNAME/weth-events/graphql, where $USERNAME is your username, to see your custom, production-ready graphql endpoint.
While you're at it, explore what everyone else is building!